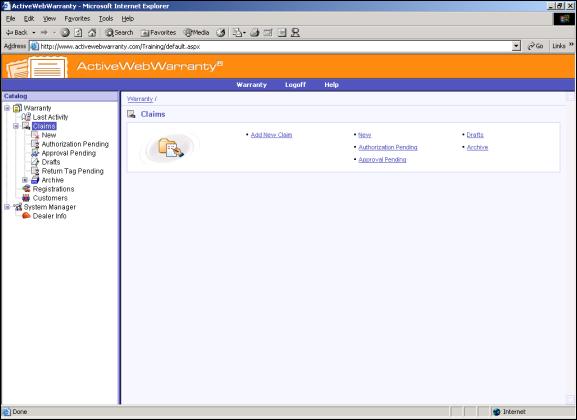
ActiveWeb Warranty lets you submit warranty claims via standard web browser.

Create a new warranty by clicking the ‘Add New Claim’ button.

The new warranty claim button will generate a warranty claim screen.
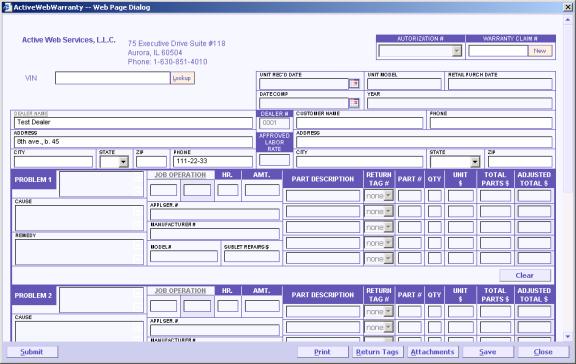
Enter in the Serial number of VIN serial number. Click the look up button.

If a serial number has been entered in the system, the application will display the contact and vehicle information related to this number. Right from the claim screen, you can update customer address information.

The dealer rate will be generated based on the profile that has been setup by the company who you are submitting the claim.

Locate the Warranty Claim # field in the right hand corner of the screen.

Click the new button to generate a warranty claim number.

Describe the problem in the field “Problem 1” (there are 2 additional fields provided if there are other problems). Fill in remaining fields as needed.

The Job Operation field is the space where you can describe the work being done on the Job Operation.

Simply click in the text field next to the Job Operation and type in your description. In addition, you can enter in the initials of the service personal who completed the job operation in the ‘Initials’ text box.

The Cause text box is where a user can enter in a description of the cause that leads to the service issue. To enter in a cause, click in the cause field and type in a description of the issue.

The Remedy Text box is where a user can enter in a description of the Remedy that lead to a resolution on the Job Operation. To enter in a cause, click in the cause field and type in a description of the issue.

The Operation Code area is where you can select pre-defined operation codes per each job operation. The company that you are submitting the claim defines these operation codes. Within each operation code, there is logic including approved labor hours, authorization requirements and return part requirements.

To select an Operation Code, click the lookup box
( ) next to the job operation text field.

Clicking the lookup box will generate a drop down menu of all available job operations. The operations are organized by category. Locate the category of the operation that applies to you service work and click on it.
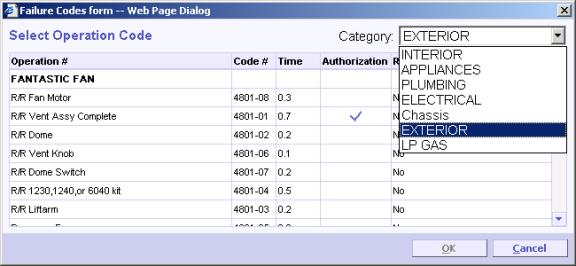
You will be presented a list of operation codes that apply to the specific category that you have selected. The scroll bar on the left hand side of the popup windows let you scroll up and down the list of codes.
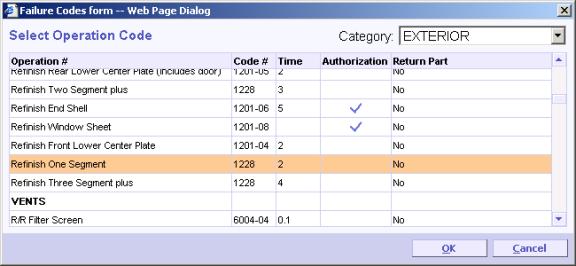
After the job operation is highlighted, click the ok button.

Each codes contains service logic that has been defined the company that is receiving the claim. These rules are designed to facilitate and automate the processing of job operations on a warranty claim.

Listed below is a description of the logic typically configured an operation code:
The ‘Operation #’ field is the description setup by the company processing the warranty claim. This field describes the job operation.
The ‘Code #’ field is the unique id for the job operation. A user can manually input the ‘Code #’ from the claim screen by entering in this number.
The Time field outlines the number of hours per operation that has been approved for this specific type of service work. A person filling out a claim can overwrite this amount and enter in a different hour amount. When a user does overwrite the operation code hour amount, the operation will need to be reviewed by the company processing the warranty claim.
The Authorization field lets a user know whether the operation requires prior authorization from the company processing the warranty claim. When an operation is submitted when it requires prior authorization, a company’s service personal will review and approve the operation.
The Return Part area designates the return rules on whether a part needs to be returned or not. The most basic return designation “Yes” or “No”.
Job Operation Codes perform calculations within each line of a claim. Essentially, these operation codes serve as the baseline for inputting and processing job operations on a warranty claim.


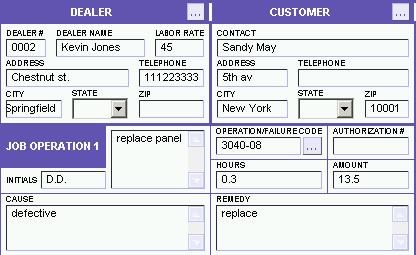
The ‘OPERATION’FAILURE CODE’ field is the unique ID for the job operation. The Code # can be selected from the drop down menu or it can be manually entered in the text box.
The ‘HOURS’ field outlines the number of hours per operation that has been approved for this specific type of service work. A user filling out this operation can overwrite this amount. When a user overwrites the operation code hour amount, the operation will need to be reviewed by the company processing the warranty claim.
The labor per job operation is populated based on Amount field.


The Authorization Number field is where a user can select and input an Authorization Number to process a job operation on a claim.
The AMOUNT field displays the total amount of labor per job operation. It takes the ‘Labor Rate’ and multiplies it times the ‘Hours’ inputted amount.
Returning Parts from Claim Screen
As part of the warranty claim processing capabilities of ActiveWeb, the application allows a user to process returned parts. Operation Codes that require a return part(s) will not be process or paid until the return part is received. As such, these operations will be placed into a ‘Pending Return’ area until the claim has been received.

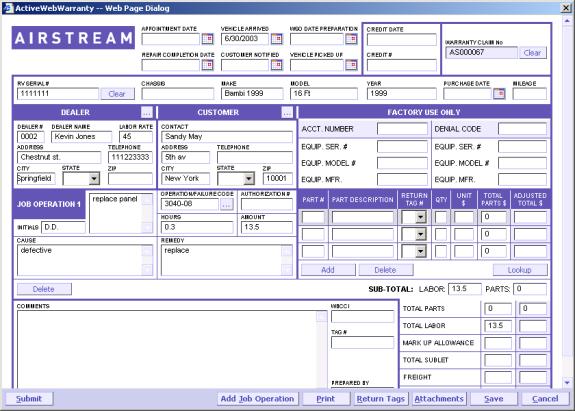
Inputting Return Part on Claim Screen
There are several ways to input returned parts into a warranty claim. You can either manually input the parts data into the claim or you can look up the parts data from the parts database.
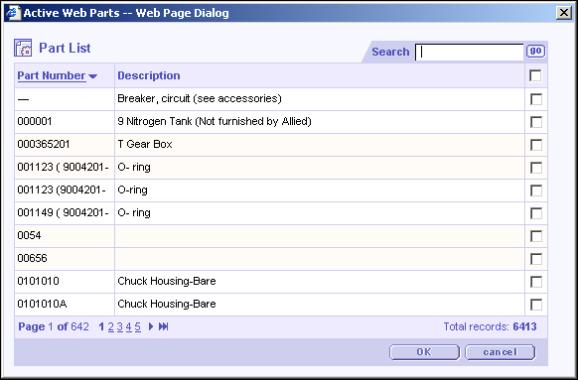
To look up parts data from the existing parts database, click the lookup button.

This will display a list of all available parts in the system. Once a user locate the part that they wish to input, the can click the check box next to the part number and click the ok button.
A user can manually enter in parts data into the returned parts area.
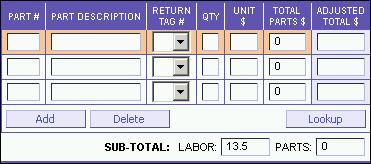
Enter in the parts number, description, quantity and unit price. The only required fields are the quantity and unit $.
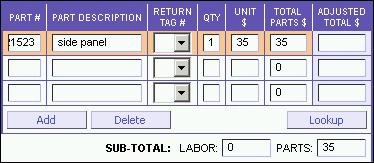
Generate a Return Tag by selecting the drop down menu from the ‘Return Tag#’ and click the new button.

